Assign inventory location - OmniOrders
This guide will walk you through the process of assigning inventory locations in OmniOrders. Follow these steps to efficiently manage your inventory and streamline your operations.
Go to app.omniorders.com
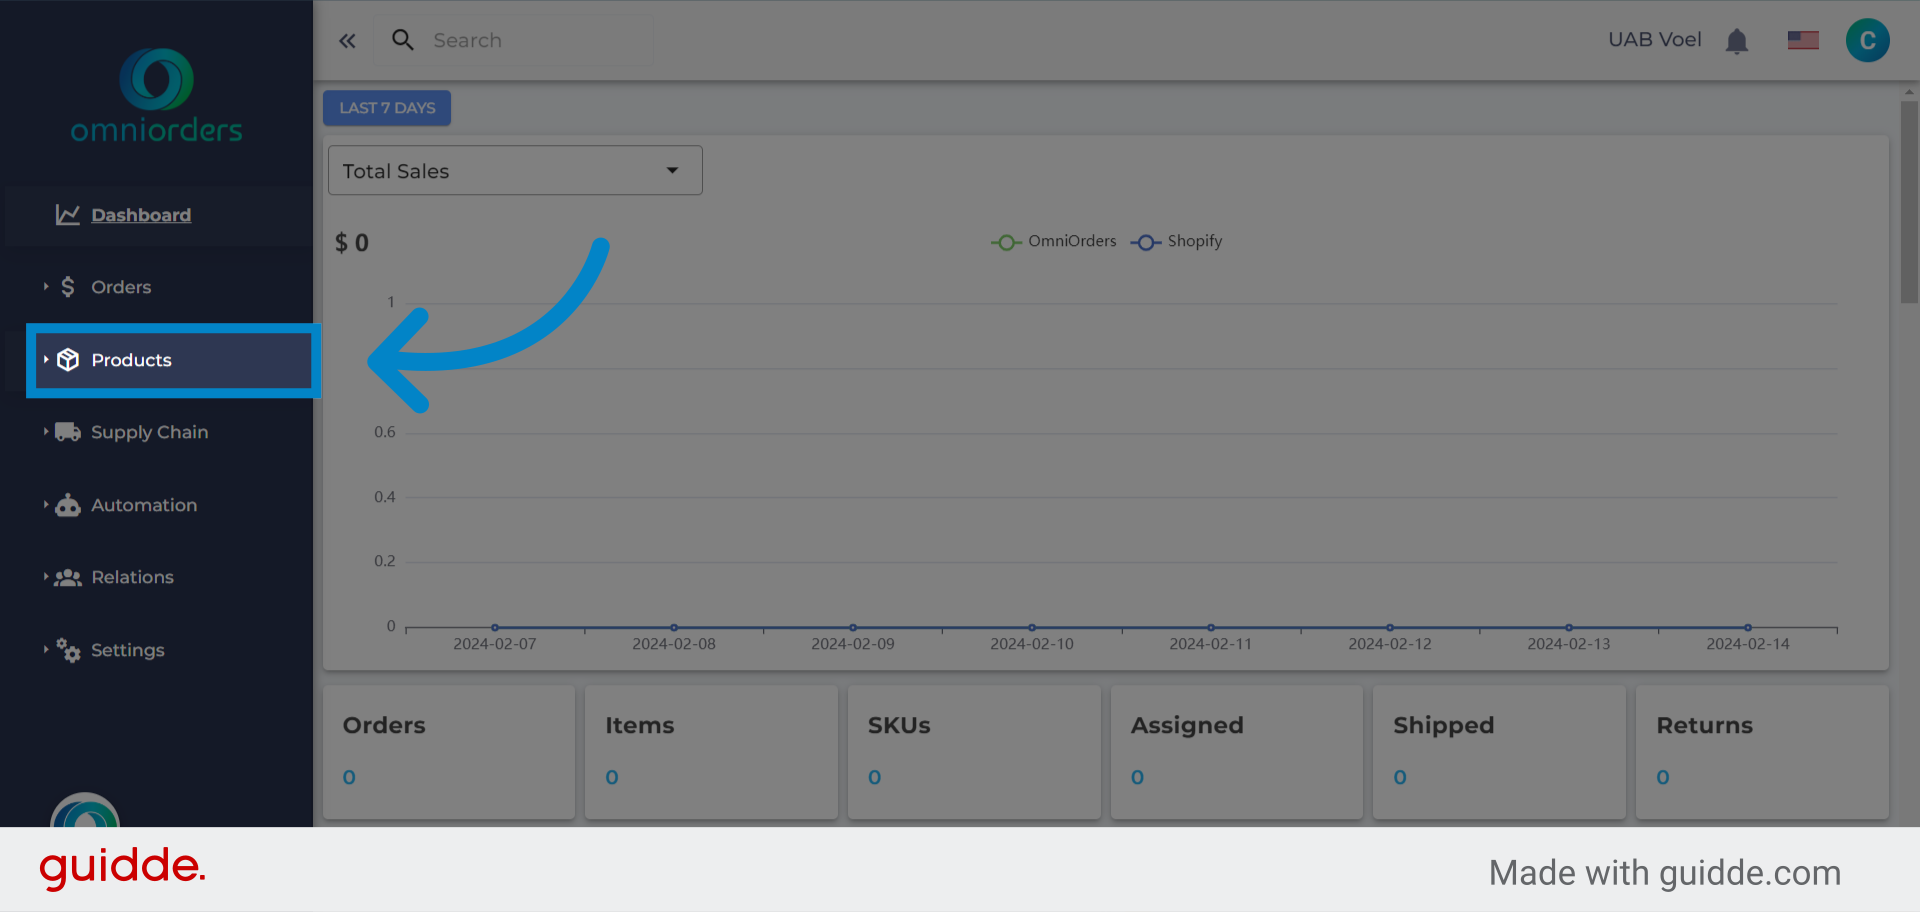
1. Click "Products"
First, click on "Products"
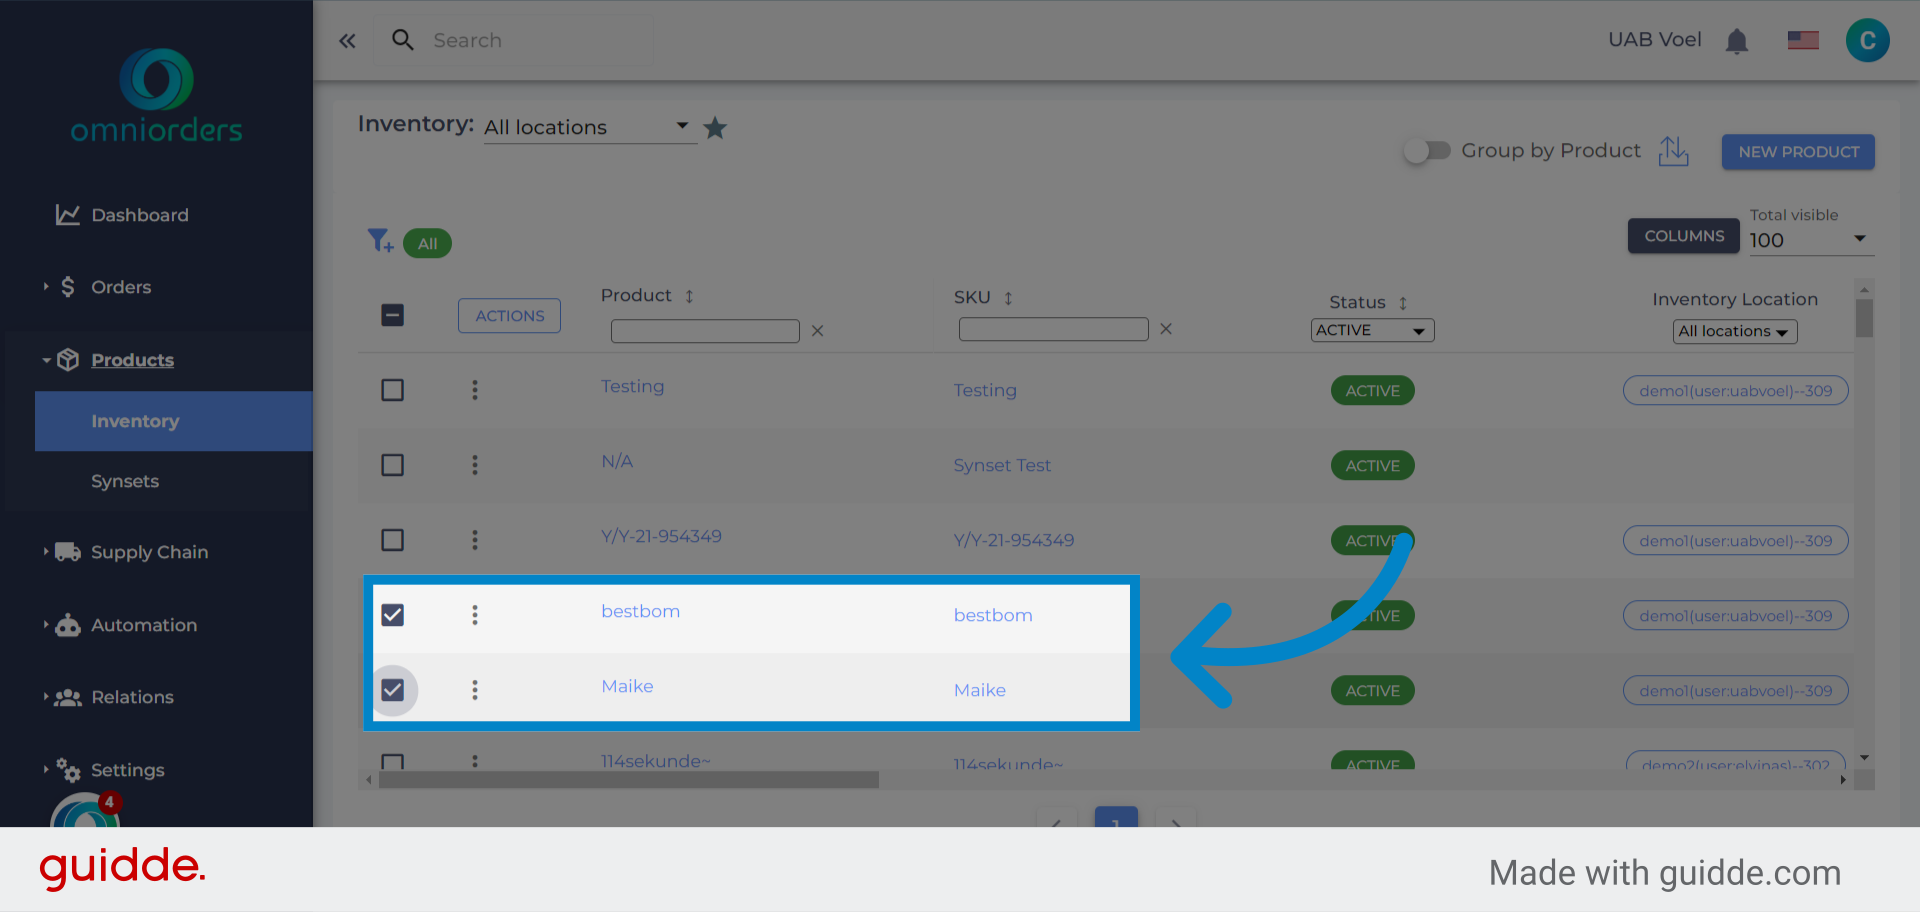
2. Click "Inventory"
Then, navigate to "Inventory" view.

3. Click here
Select the SKUs you want to assign to the specific warehouse.
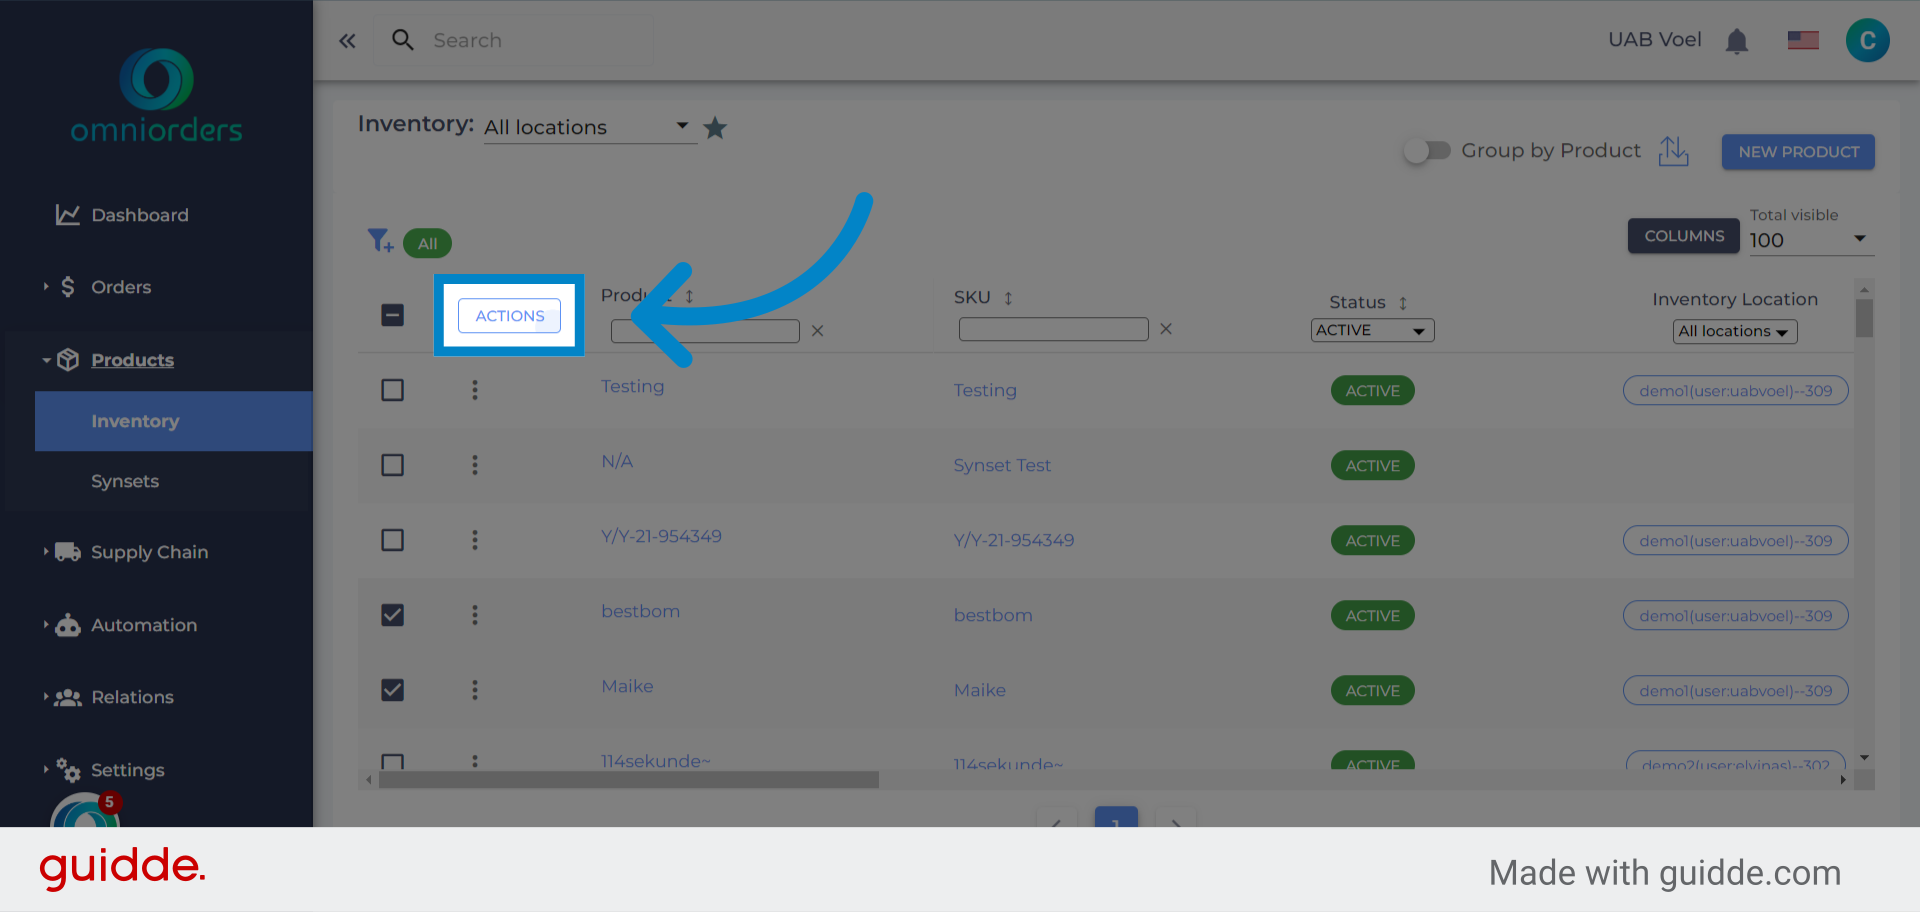
4. Click "Actions"
After selected the SKUs ,choose the "Actions" option.
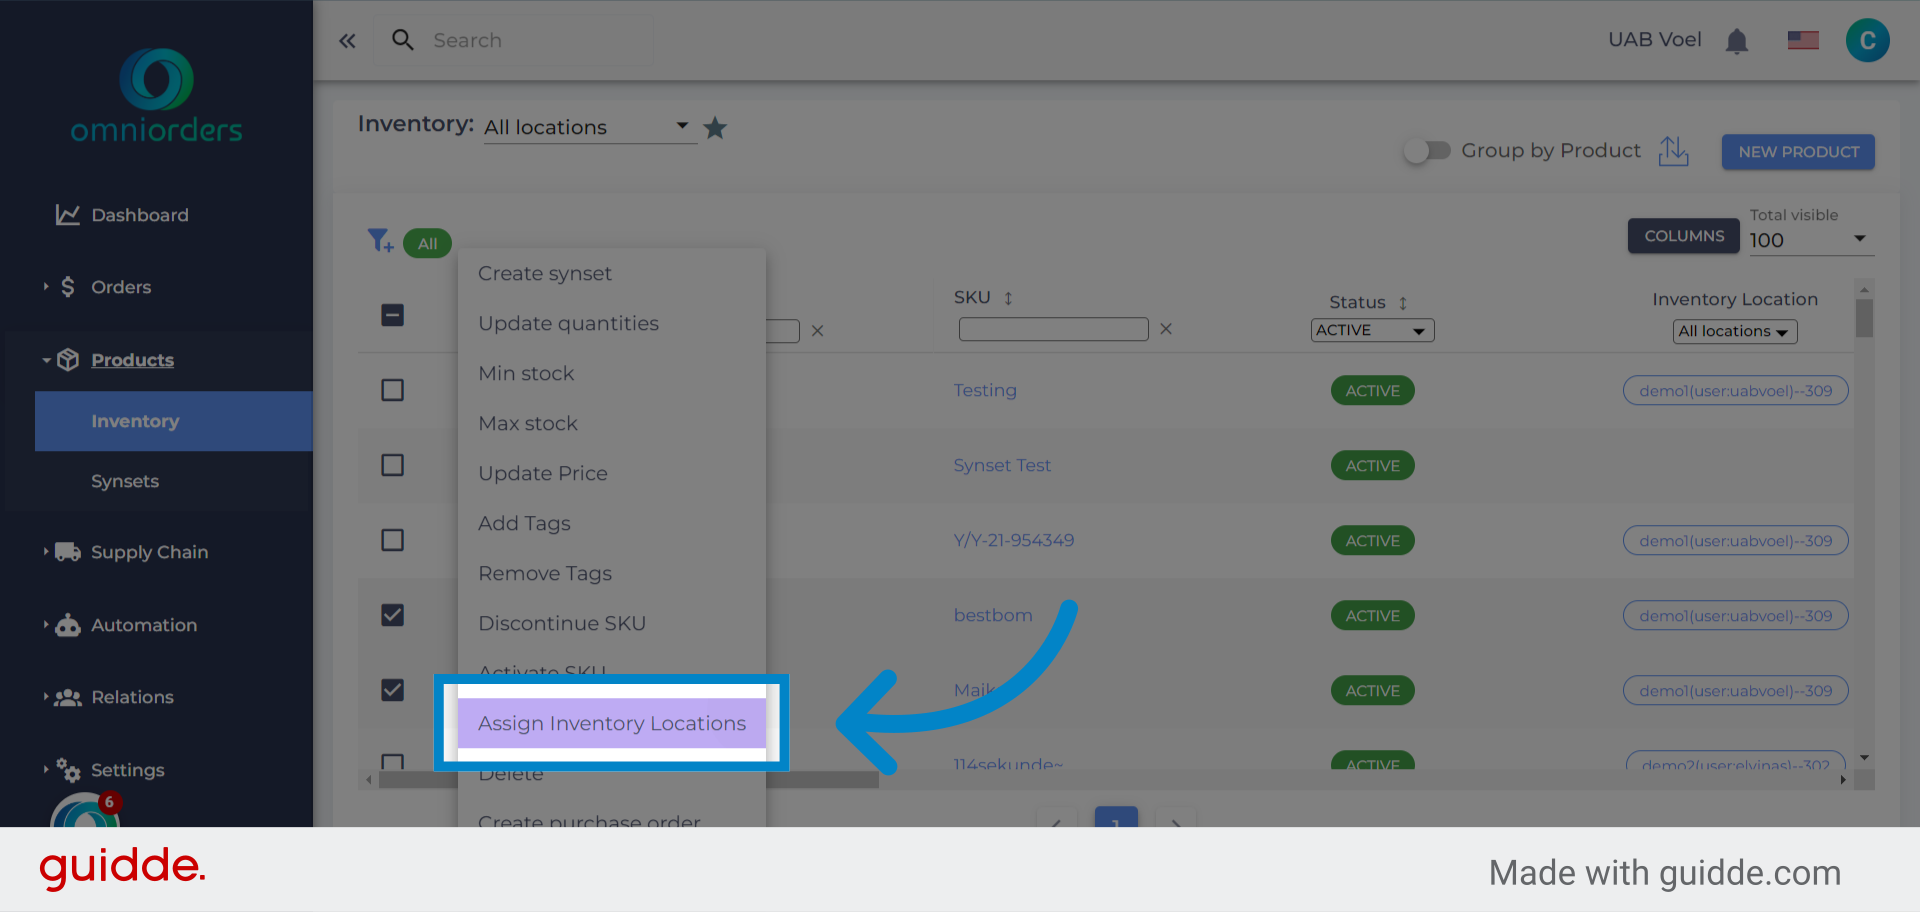
5. Click "Assign Inventory Locations"
then, click on the "Assign Inventory Locations" field
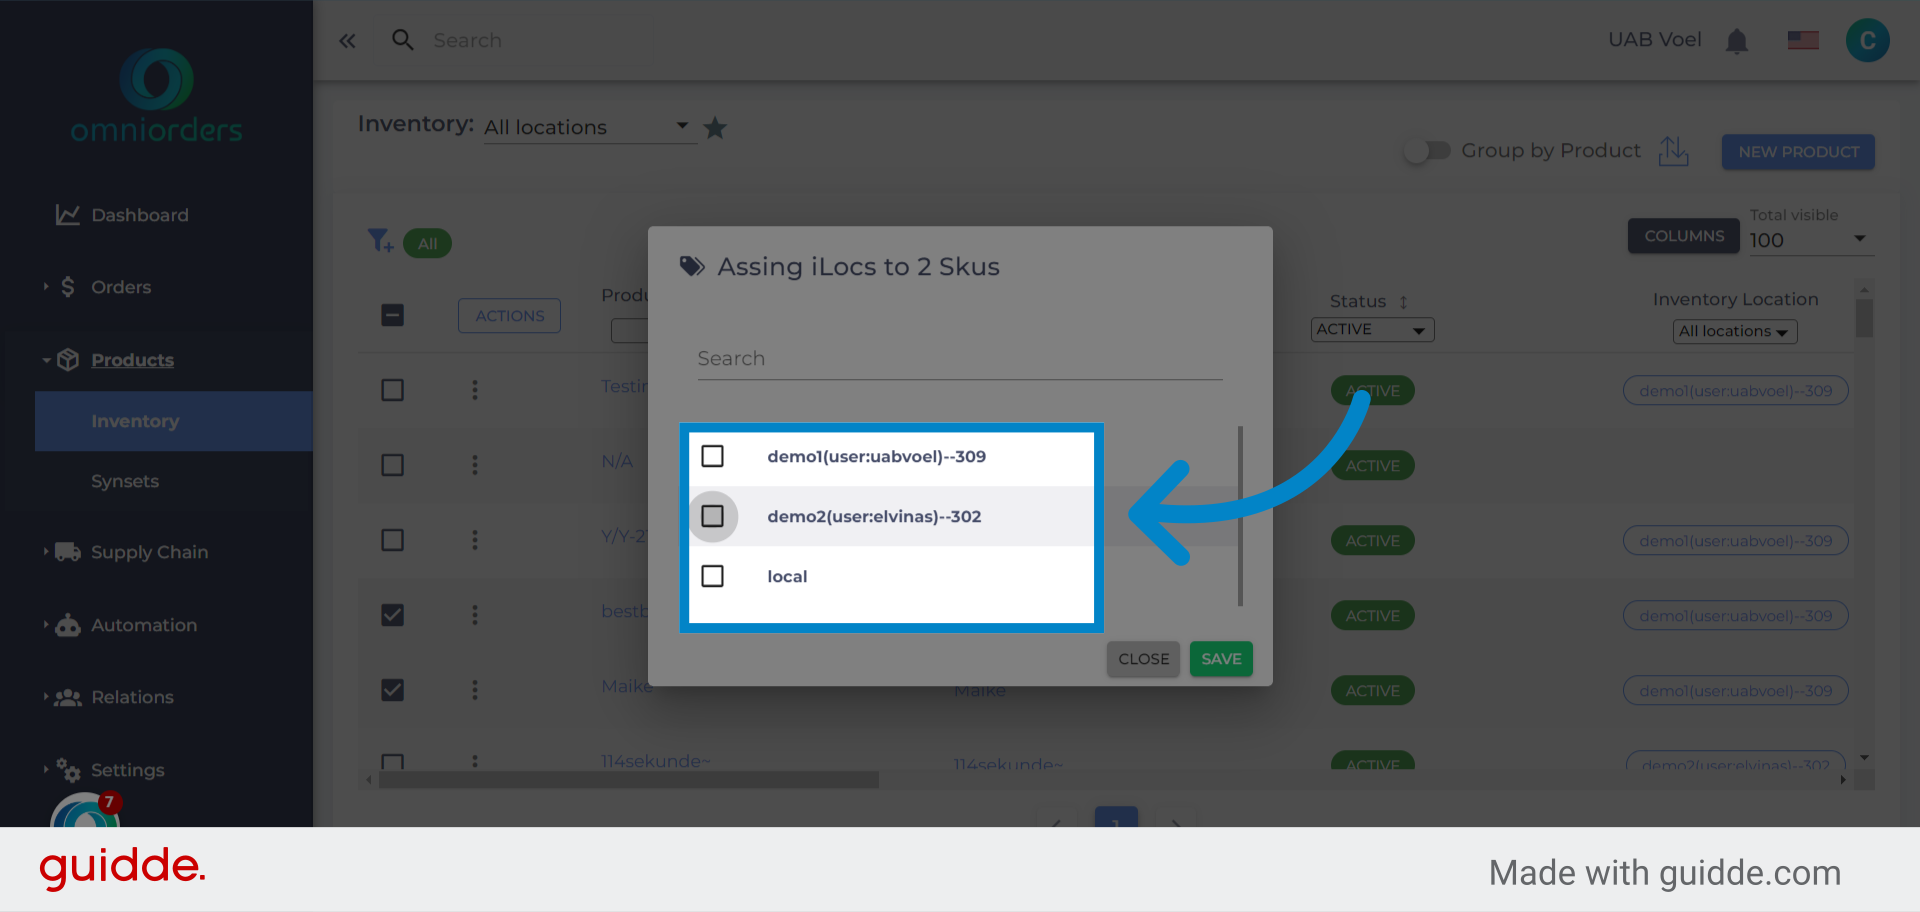
6. Click here
Select the inventory location you want to asssign your SKUs.
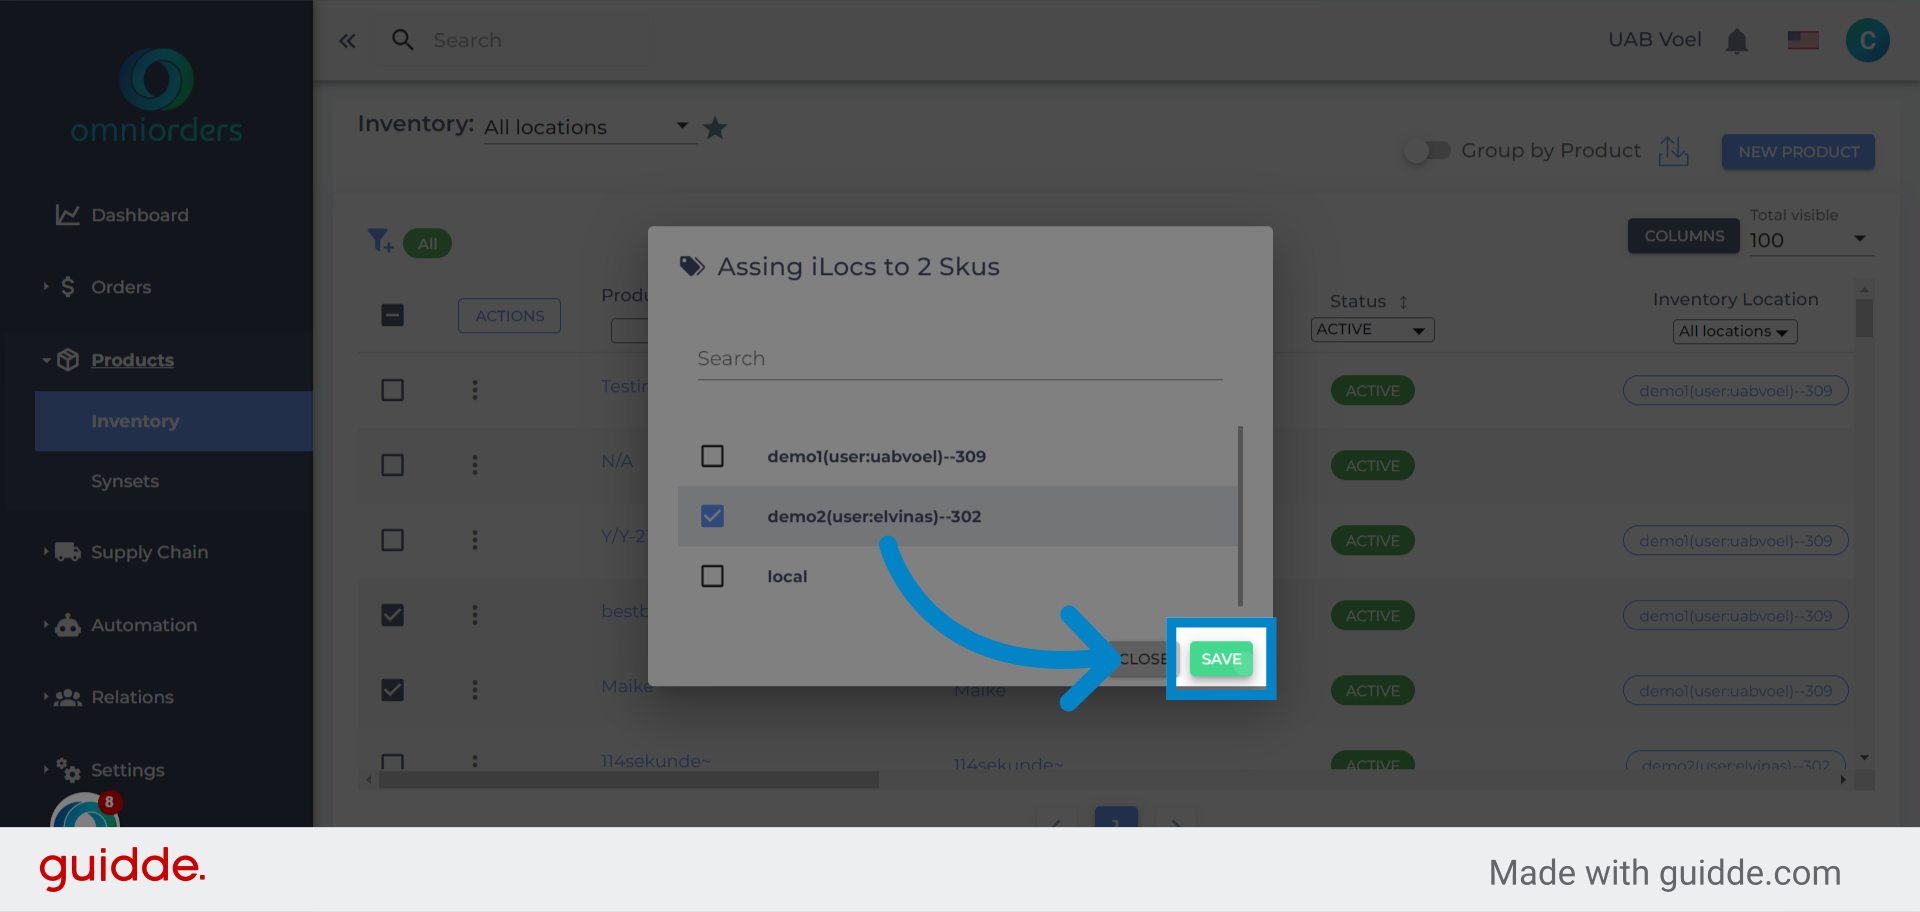
7. Click "Save"
Select the option to "Save" your choice.
In this guide, we covered the process of assigning inventory locations in OmniOrders. By following these steps, you can optimize your inventory management and ensure accurate tracking of your products.
Was this article helpful?
That’s Great!
Thank you for your feedback
Sorry! We couldn't be helpful
Thank you for your feedback
Feedback sent
We appreciate your effort and will try to fix the article